The execution tab on the toolbar at the top of the screen allows the head of Internal Audit to monitor how the various audits are progressing. Selecting the execution tab brings up the following screen:
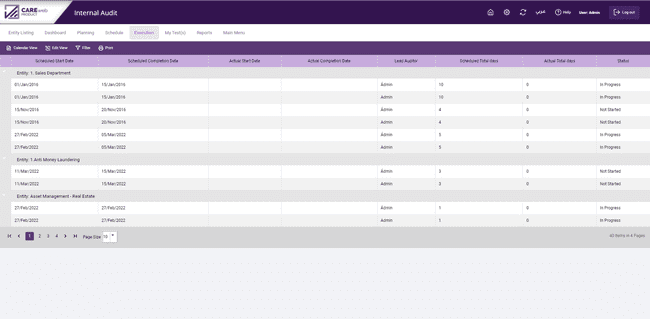
As per the example outlined in the above screenshot, we can see that the work has commenced (on the 20th of March 2018) on “Purchases (before testing)” entity and work has been underway for a little while on Commercial Credit.
Once the audit work is done and all tests have been completed and approved it is necessary to produce the Audit Report. Before this can happen, the Lead Auditor needs to open the Schedule for the Entity in question and on the toolbar at the top of the screen click on "Final Approval"; this will bring up the following screen:

Here you enter the actual dates for starting, finishing and reporting on the Entity. Clicking on "Apply" in the toolbar inserts this data into the centre panel of the Scheduling screen.
The Audit results will not impact the entity’s control environment and scores until the audit has been “finally approved”.
If you now click on "Audit Report" in the centre of the toolbar, you will get a screen showing any current reports produced. Click on the "New Report" tab on the toolbar and you will be presented with the following screen:
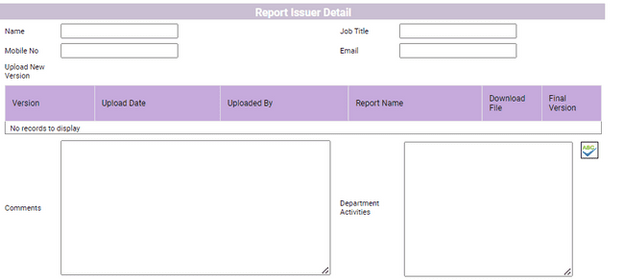
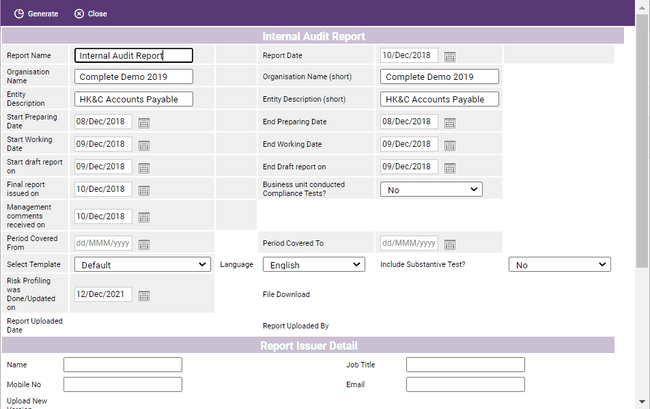
Report Name: Name of the report.
Report Date: This field will be automatically filled with the scheduled reporting date provided during the scheduling process.
Organisation Name: This field will be automatically filled with the Name of the organisation.
Organisation Name (short): If the user wants to use an Abbreviation or a shortened name for the organisation in the “detailed findings” section of the report, he needs to enter it here.
Entity Description: The name of Entity being audited.
Entity Description (short): If the user wants to use an Abbreviation or a shortened name for the Entity in the “detailed findings” section of the report, he may provide it here.
Actual Completion Date: The date on which the actual fieldwork was completed.
Management Comments Date: The date on which management comments were obtained
Draft Report Issued On: The date on which the Draft report was issued.
Final Report Issued On: The date on which the Final report was issued.
Period Covered: the period (in months) covered by the audit.
Audit Period ending on: The date the period covered ends on.
Entity Last Audited: The date on which the Entity was last audited.
Risk Profiling was done on: The month in which the Risk Profiling workshop was conducted.
Controls tested: The types of control tested, it can be Key Controls, All Controls etc.
Entity Employee Number: The number of employees working in this Entity.
File Name: The report will be saved under this file name
Report Version: If a revised version of the report was uploaded then the user can enter its version Number.
Template: This is where you can select the preferable template to use for the report you are going to generate in case several templates were defined on the system
Comments: A free text field to provide comments about the report.
Department Activities: The activities performed by the department that need to be included in the IA report.
Now click "Generate" and the report is saved in the system
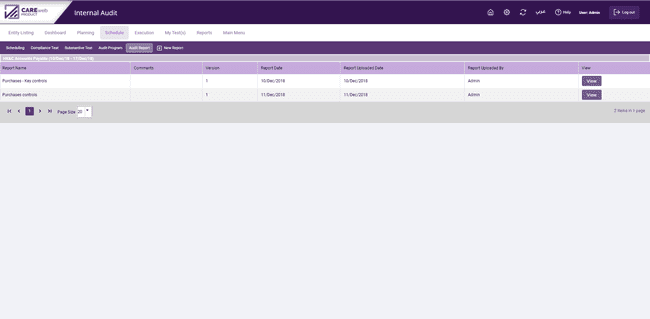
Now, if you click on "Audit Reports" on the toolbar at the top of the page and click on the "view" button at the far right-hand side of the report you are interested in, the system will generate for you a screen highlighting the details of the selected Internal Audit Report as shown below :
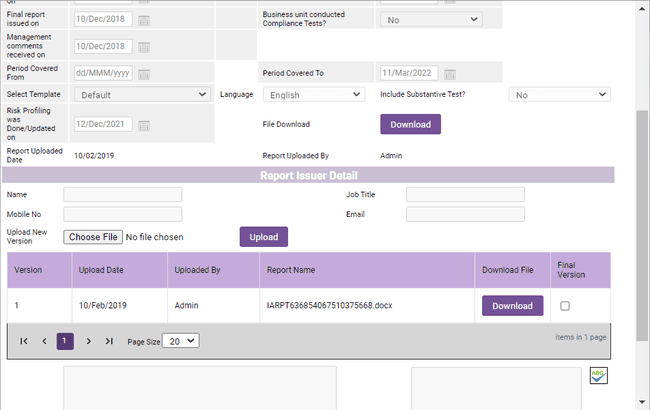
Click on the download button available at the bottom of the summary screen to download the selected IA report.
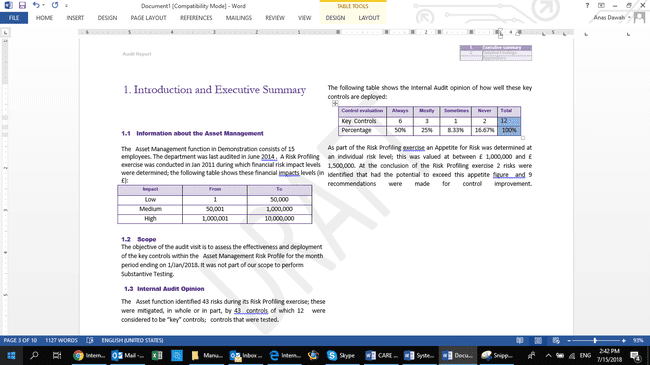
This is formatted in a particular "house style"; whatever style you use in your business can be set up for you when the system is installed.
This report is in draft and so you can make any changes to it that you wish and save it back into the system. To do that, click on "Audit Report" on the toolbar at the top of the page, you will get the list of reports you have generated earlier as shown below:

Clicking on the report you want to replace with the revised version, the system will bring up the summary of report details screen:

Click on Choose File button next to “Upload New Version”; select the revised report file and click upload. You will notice that the system will automatically register the date the report was modified and the username of the auditor that has uploaded it.