Clicking on “Parameters” will bring up the following screen:
This is where you can personalise the system to your own organisation; we will deal with each of the tabs across the top individually.
Definitions
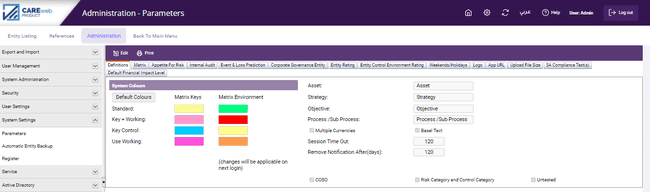
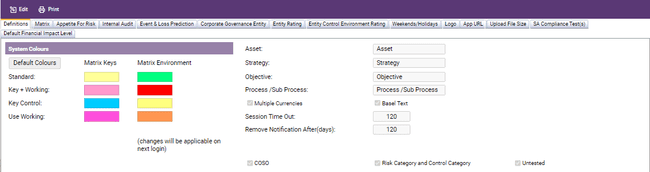
System Colours
The various screen displays and printed output in CAREweb™ utilise a colour coding system and the colours used can be personalised to your own organisation in this section of the Parameters Screen. Click on the “Edit” tab and the screen will change to show the following:
Clicking on any of the “colour matrices” will bring up a selection palette:
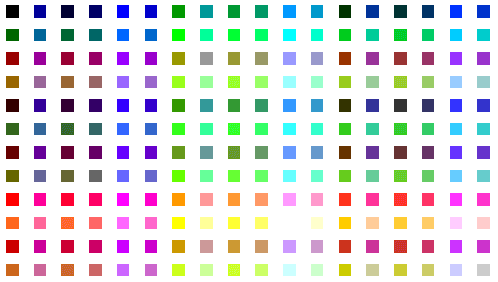
Click on whatever alternative colour you wish to use and then click “Save” to save the record.
Setting up Key Elements / Terms
Within any Risk Management framework there are key elements / terms that need to be setup earlier on, such as:
•the different elements of the organization that could be under threat from risks;
•the strategy of the organization;
•the objectives given to various functions within the organization to help it meet its strategic goals;
•Whether the organisation conducts its business in a single currency or in multiple currencies.
•Whether or not the organisation needs to comply with Basel regulations.
Different organizations have different terminology for these elements and CAREweb™ allows you to tailor the database and reports so as to reflect your own terminology.
Click on the “Edit” tab and the screen will change to show the following:
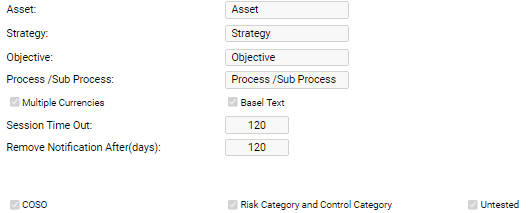
The first category, Asset, relates to the organisation’s elements/resources that could be adversely impacted by risks; these could include:
•Cash &Profitability
•goodwill/reputation
•Information
•physical assets
As can be seen, these are not always tangible things and so to call those "assets" might be a bit misleading. Perhaps you think it would be better to call this element "what is at risk"; if you do, then delete "asset" in the box and replace it with "what is at risk".
Similarly, with strategy, if your organization has a medium-term series of goals and objectives but it is not referred to as a strategy, then replace strategy with whatever you do call this document. Objectives is a similar concept; if your organization's medium-term goals are broken down into short-term tasks for various functions but these are not called objectives, then replace objectives with what they are called.
You may not deal in products or services but, say, process/subprocess then you can change this here.
If your organization does not deal in more than one currency then remove the tick against Multiple Currencies; similarly, if you are not subject to the provisions of the Basel Capital Accord remove the tick against this item.
If the user leaves the system idle, the system automatically terminates the session and logs out the user. In the "Session Time Out" field you can set the time in minutes for the system to wait before it terminates the session. Note: Any changes made will be applicable after the next login.
Later in this manual we will discuss an area of the system where the user can elect to have various anomalies in the database reported by the system automatically; these are called notifications. These notifications will be reported every day until rectified or until a set period of time has elapsed; to determine this elapsed period of time enter the number of days in this screen in the "Remove notification after (days)" box.
In Case the user wants to use COSO Principles and Elements, Risk category and control category to be appeared in reference, user need to activated from the above screen. Moreover, System gives users the ability to evaluate the control test results as “untested” or any of the option except “untested”.
Matrix
Score Weightings
These are the weightings used by the system to calculate the various risk scores in the Risk Matrix (see later in Risk & Control Evaluation section). These risk scores are a function of:
-The importance of the Risk Element under threat to the organisation (Legal/Regulatory, Cash, Goodwill, Information etc.)
-The likely size of the impact on that attribute should the risk occur
-The probability of the risk occurring IF THERE WERE NO CONTROLS IN PLACE
-The Level of control in place “Environment”
All of this will be explained in more details later when the Matrix element of the system is described. Suffice to say that the factors applied for Impact, Probability and Control environment can all be changed from their default settings here. If, for example you feel that a control environment of “A” should present a risk as being nearly perfectly controlled then change the parameter from 0.25 to, perhaps 0.1 or even 0.01; if you want “D” control environments to really stand out then change the parameter from 1 to, perhaps 10. The letters in the “Code” column are the ones that will appear in the various reports against items with an attribute of High, Medium or Low; if, for any reason, the assigned letters are not the ones you wish to appear, they can be changed here. You click "edit" to make the changes and after making changes click “Save” to save the record and ensure they take effect.

Appetite for Risk
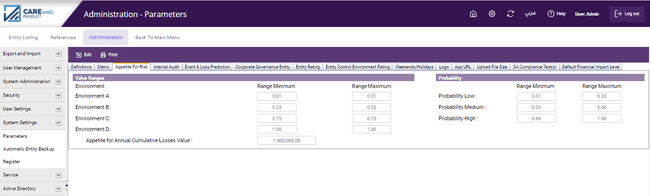
Value Ranges and Probability
Like the Score Weights above, these values can all be changed here to personalise your system. These values are the ones applied by the system in the various charts it produces - such as the Appetite for Risk graph – all of which are described in more detail later in the “References” and “Entity Risk Profiling” Sections.
Appetite for Annual Cumulative Losses
This allows you to specify the maximum value of Annual Cumulative losses determined by the board. This value can be compared against the total value of all actual event losses in the event appetite chart. An email alert can also be added to inform the Risk Management department if the total values of all actual event losses reach 50%, 75% or 100% of the “Appetite for Annual Cumulative Losses” value.
Internal Audit
Risk Scoring Parameters
These are used in the Internal Audit module and will be explained in the “Audit Planning – Risk Evaluation tab” Section of the manual.
Annual Working Days
Before starting any audit, users have the ability to define the total number of Annual working days as shown in Figure below. The available annual working days for each employee will be taken into consideration when calculating the Internal Audit team Available Man-days.
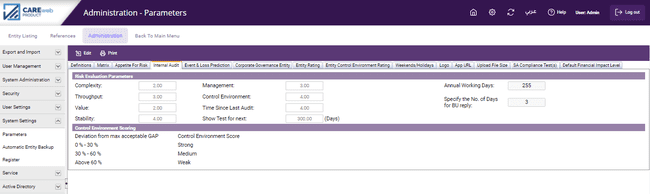
Number of Days for BU reply
From this tab the user can define the allowable number of days for them to send their replies on the audit findings.
Event & Loss Prediction
Event Frequency per Annum
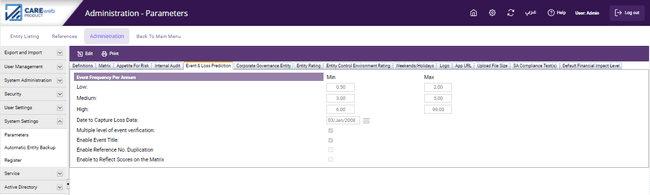
For each risk in the system, we are able to document the probability of its occurrence. If it has been decided to use a 3-grade system of High, Medium and Low, as displayed in the Score Weights section above, it is necessary to tell the system how many times a year a risk is likely to materialise for it to fit into a particular category. In the example we have here, it is thought that if a risk materialises three to five times a year that is considered Medium, any more than this is high, any less is Low.
Note: there cannot be any overlap between the top of Low and the bottom of Medium, or the top of Medium and the bottom of High. Also, since several calculations are made from this data, the top end of High cannot be left blank and so a maximum number of likely occurrences needs to be filled in, in this case 99. Also, since this parameter refers to events, you can't have fractions - i.e., an event can't "half happen".
Date to Capture Loss Data:
This is the earliest date from which your organization has details of loss events. Use the calendar icon beside the box to make your selection.
Multiple level of event verification:
Once an event is created or modified in the system by a business unit, it is required to be verified by the Risk Management Department. However, in some instances the organisation may want to introduce another level of verification (i.e., verification by business unit manager), in such cases this option should be selected by putting a tick in the box.
Enable Event Title:
This option is here so as to allow the title of the event to appear in all of the reports.
Enable Reference No. Duplicated:
By activating this option, the system will allow the users to enter events that have the same reference number.
Enable to Reflect Scores on the Matrix:
Upon defining each event, the system allows you to re-evaluate the strength of the controls linked to the event that occurred, by activating the “Enable to Reflect Scores on the Matrix” option the system will directly reflect the re-evaluation score entered in the event screen on the matrix screen.
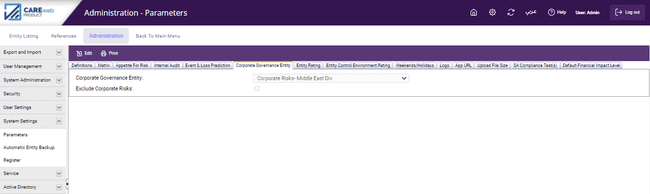
Corporate Governance Entity
To utilize the Corporate Governance Module, you will need to tell the system which of the entities in your database are to be treated as the high level, Board managed, Business Unit where your Corporate Risks are stored. You do that here by clicking “Edit” and then using the arrow to the right of the box to produce a drop-down window showing all entities in the database, scroll bars are provided to move through the list; highlight the one representing your Corporate Risks and simply click on it to insert it into the box. Clicking “Update” saves the record.
The system has the ability to produce many reports that analyse all of the data in the database. Sometimes, though, you do not want these reports to be distorted by the inclusion of high level, Corporate, risks; for example, a report designed to show the, say, 10 riskiest areas of the company would almost certainly contain one or more Corporate Risks. To avoid this, you can tell the system to exclude Corporate Risks from all reports by putting a tick in the box on this screen.
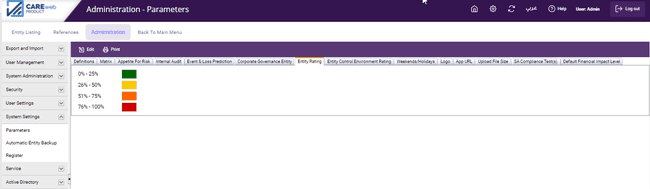
Entity Rating
After evaluating risks and controls for an Entity, the system will assign a risk rating to it (High, Medium, Low); this is colour coded on the Entity screen. This function determines what colour is assigned to the relevant risk level. To make your selection click on Edit then use the colour pallet you wish to change and make your selection; clicking Save saves your selection.
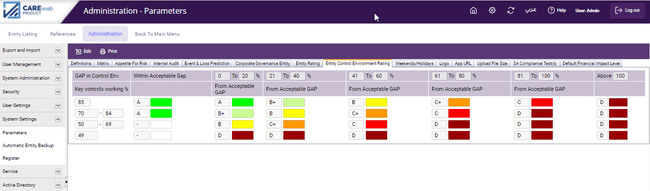
Entity Control Environment Rating
These are used in the Entity Environment Report section that will be explained later in the "Risk Matrix" section; suffice to say here that the various colour schemes used in that report can be changed here in exactly the same way as the Entity Rating above.
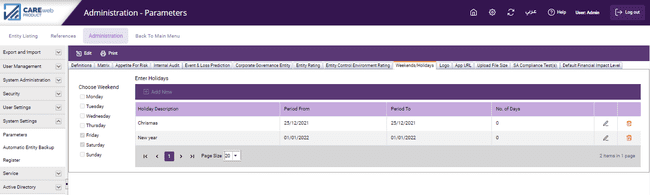
Weekend/Holidays
Weekend
To ensure that Internal Audits are only scheduled for weekdays, this tab is used to define the days of the week classified as weekends for the country where your business operates; the selection is made using the relevant tick boxes.
Holidays
To ensure that internal audits are only scheduled for working days the system provides the user with the ability to define annual Holidays. In addition, the defined Holidays are taken in consdieration when calculating the Internal Audit team members available mandays.
Logo
This tab allows you to upload your organization’s logo in order for it to appear in all of the reports generated by CAREweb™ . To upload the desired logo, click on ![]() and the following screen will appear:
and the following screen will appear:

Click on choose file and select the logo from your desktop and click on upload. Once you upload the logo you can customise the width and height of the logo to appear in the desired format in CAREweb™ reports. 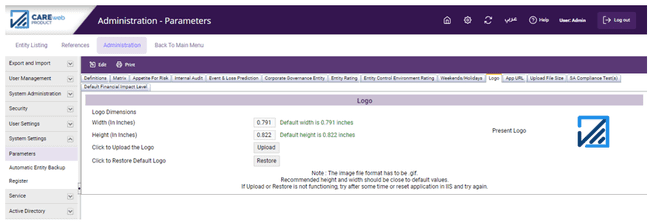
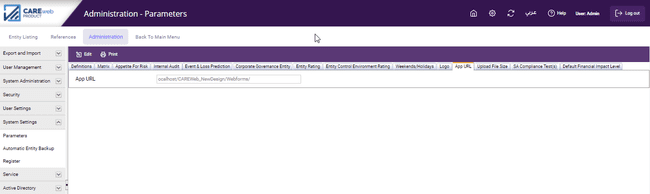
App URL
This shows the location of CAREweb system on your organisational server.
Upload File Size
From this screen you can specify the maximum file size that can be upload on the system.

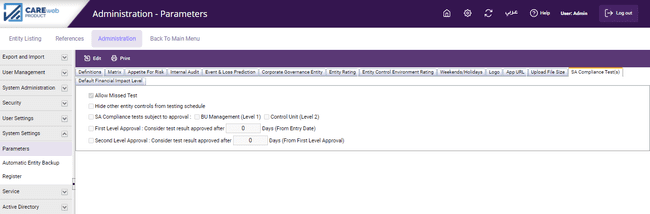
SA Compliance test(s)
If you want to allow the business unit heads to enter the results of their Self – Assessment compliance tests (explained later in this manual) after missing the scheduled test date, then tick the "Allow Missed Test" box.
The system will also provide a Testing Schedule to show when each control has to be tested. This schedule will include all controls, including Entity controls. The effectiveness of these Entity controls is usually decided when the Entity to which they relate is tested, therefore, to avoid having an overly long Testing Schedule you can arrange to have Entity controls omitted from the schedule by putting a tick in the "Hide other entity controls from testing schedule" box.
The system also allows you to subject SA Compliance tests to an approval workflow. If you wish to subject the tests to the Business Unit Manager and/or Control Unit approval then select the relevant box(s) as outlined in the screen below. In addition, the system allows you to define deadlines after which the test results will be considered as approved (if the Business Unit Manager or Control unit approval was not obtained within the specified deadline).