The next application under User Management is Roles. This application is designed to assign the various responsibilities that individuals have over particular entities within the system; for example, an Administrator might be the person who runs the system on a day-to-day basis, adds/deletes Users, adds new Business Units etc. while a Local Administrator might be responsible for the same tasks but on a local basis. These roles, along with their functions are set up here.

To add another role, perhaps " Head of Internal Audit", click on the "Add New" button at the top left of the screen to bring up the following page:

Type " Head of Internal Audit " in the relevant box and then click "Save"; the screen then changes to:
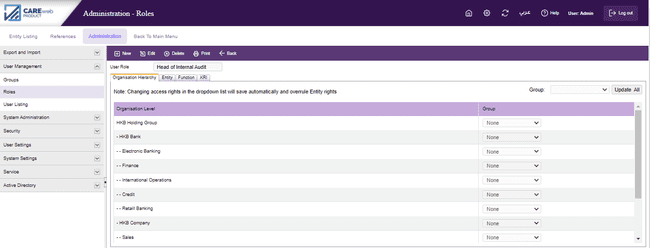
Using the "Edit" button at the toolbar on top of the screen, the user can personalize the access rights to this role in regards to the Organisation Hierarchy, Entity and Function. Click on the “Edit” icon and then click on the “Organisation Hierarchy” Tab, you will notice that you now have a list of all of the Organisational Hierarchy levels you predefined in the system. Next to each level/sublevel, a “Group” drop down list is available to select the access right for each Level. If you click "None" then this role will have no rights at all over that particular Level. If you want to select the same access rights for all Levels, use the drop-down list at the top right of the screen to select the relevant Group and click “Update All”. You will note that the Group name will be automatically filled against each Level in the Organisational Hierarchy.
To edit the Entities this role can access and the access right to these entities, click on the Edit Icon, then click on the Entity tab at the top left of the screen. The following screen will appear:
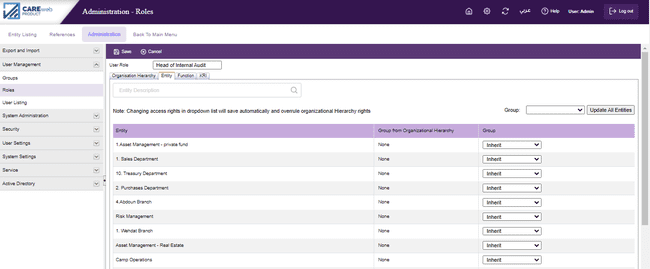
You will notice that you now have a list of all of the Entities in the system. Using the drop-down arrows, you can select the access rights this role has over each Entity. You can see that the drop-down shows all of the Groups within the system, the user can select a particular group to assign the same rights of the selected group to this role; if you click "None" then this role will have no rights at all over that particular Entity. If you want to select the same access rights for all Entities, select the group using the drop-down list at the top of the screen and then click “Update All Entities” and you will see that the Group name will be automatically filled in against each Entity.
If you wish to edit the Functions this role can access, then click on the "Function” tab at the top left of the screen and the following screen will appear:
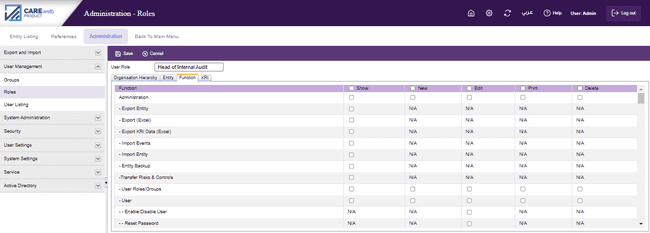
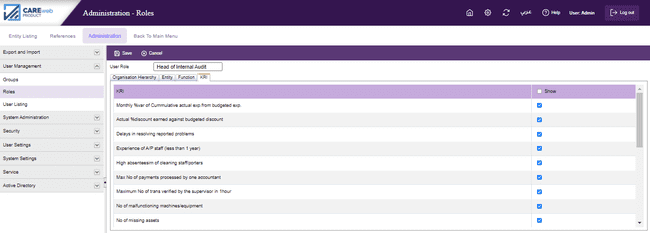
Notice that separate access permissions are provided for each page of the ‘Event References’ function’. Also, the ‘KRI Value’ permission is separated from the ‘KRIs’ permission. This is shown in the following screenshot:

Also, the system gives the ability for the test to go through a workflow, BU officer will submit the test and the BU Manager and Control Unit should approve it to consider the test result.
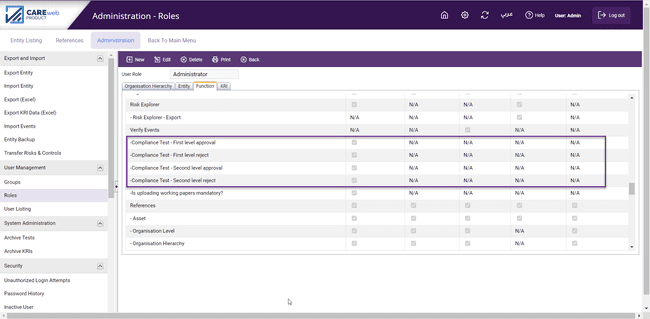
You tick the relevant functions for the role and the level of access (create new items, edit or delete items etc.) and then click "Save". The resulting screen will show the function(s) you have assigned:
