The first thing that can be done from here is to set up User Groups. In the “Groups” module, the Administrator can define the permissions they want to give to users. In short, you can define a new group with specific permissions, and then make the users that you want to apply these permissions to, members of that group.
Click on “Groups” to bring up the following screen:

Here we can see that some Groups have already been set up; to add another group click on the "Add New" button at the top left of the screen to bring up the following page:

Give your group a unique name, perhaps “Quality Assurance” and select one of the existing groups' permissions to assign to it.
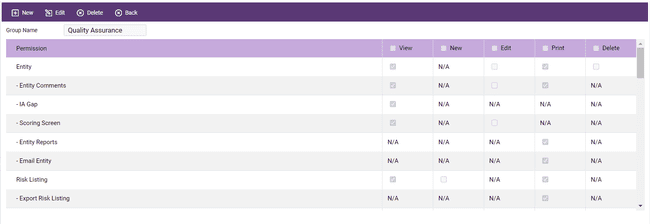
Now, if you do not want your new group, “Quality Assurance”, to have the exact same permissions as the previous Group, you can edit permissions, by selecting the group and clicking on the Edit button that appears at the top of the screen. You will then get the following screen:

Listed on the vertical axis are all of the major attributes of the system and on the horizontal axis all of the permissions - view, add a new item, edit an area etc. So, at the moment our “Quality Assurance Group” can view the Entity Scoring Screen data; if you think this shouldn't be allowed you can "un-tick" the box to remove this permission.
You can remove permissions by "un-ticking" the relevant boxes or add new permissions by ticking the relevant boxes.
Note: The tick boxes at the top of each column can be used to set all of the permissions; either all ticked or all un-ticked.
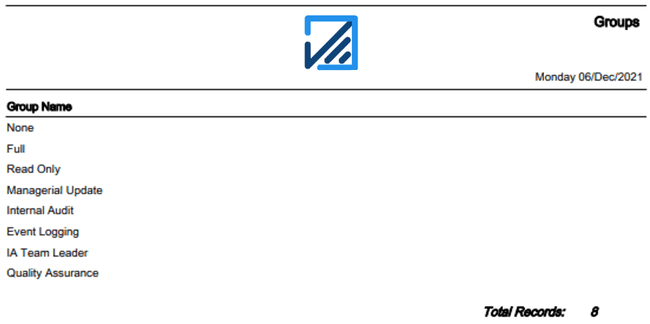
Finally, in the “Groups” screen, the “Print” tab allows details of all Groups in the database to be printed. Since we have mentioned printing several times now, it is worth making a general point on the subject here.
NOTE: when printing any report from CAREweb™, the report file is generated in PDF format, therefore the screenshot below may appear different on your screen depending on the PDF viewer installed on your computer.

In addition, it should be noted that any report that can be printed can also be e-mailed simply by using the "Email" button.