To bring files in to the system use the “Import” function; clicking on this tab brings up the following screen:

Use the ![]() button to identify the location of the file you wish to import, double click on the relevant file, or click "Open", and its location will be stored in the “Select File” box; now click
button to identify the location of the file you wish to import, double click on the relevant file, or click "Open", and its location will be stored in the “Select File” box; now click ![]() and this will bring up the following screen:
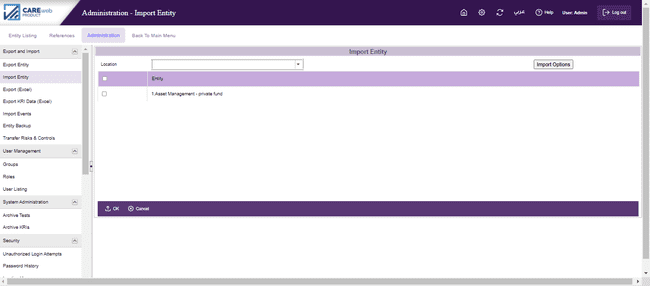
and this will bring up the following screen:

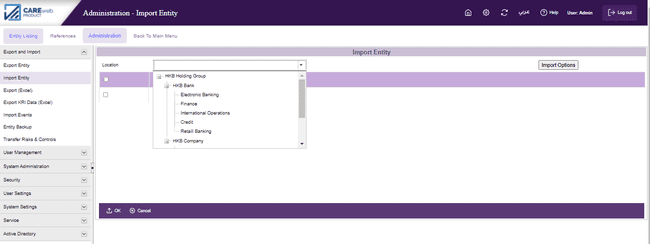
If you wish to import all entities in the selection, click on the check-box on the top left-hand corner of the banner, otherwise, click on the check-box next to the entity(s) you wish to import. For the Entity(s) being imported it is important to specify its location in the organization's hierarchy. To do this, use the drop-down arrow in the "Location" box at the top of the screen to bring up the hierarchy map:

Click on the relevant location and it will be inserted in the location box automatically.
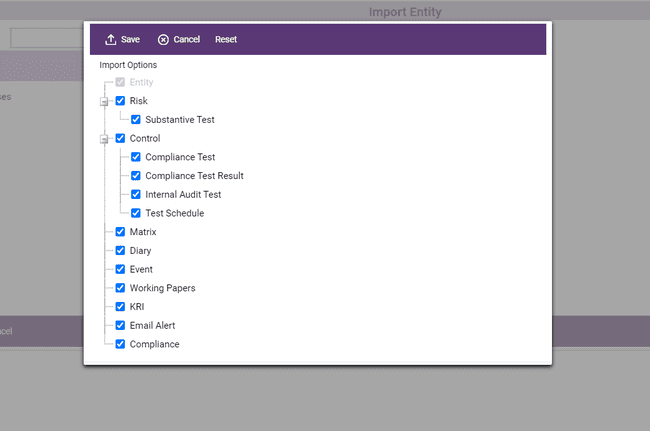
This allows you to select the data you wish to import for the chosen entity. Clicking on this icon brings up the following screen

If you do not wish to import all the data relating to the entity, then untick the relevant box(s). Now, click ![]() in the bottom left-hand corner of the toolbar and the import will be completed. If the Business Unit you are trying to import already exists in the database, the following message appears:
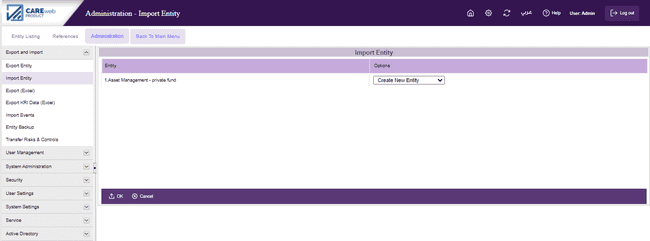
in the bottom left-hand corner of the toolbar and the import will be completed. If the Business Unit you are trying to import already exists in the database, the following message appears:

The drop-down list provides you with a list of importing options. You can either, skip importing the entity, overwrite the current entity in the database with the one being imported, or create a new entity. If you select to create a new entity, the system will change the name of the entity and add to it the date and time of import.
Before the import process is complete, CAREweb™ will compare the system’s existing parameters against the parameters of the Business Unit being imported, these are:
•Asset type
•Responsibility
•Diary
•History
•Event details
•Compliance Tests and Schedule.
If any of these records – such as Asset or Responsibility – do not exist in the database to which the Business Unit is being imported, then they will be created.
If an Asset type already exists in the database but has a different weight, the system will bring up the following screen:

Here it will show the asset’s current weight in the database and the new weight that is assigned to the entity being imported. The user has the choice of either keeping the current weight or replacing it with the weight attached to the entity being imported, or if needed, he can also enter a new weight.
Click “OK” to proceed or “Cancel” to terminate the import process.
If the entity you are trying to import is linked to another entity (i.e., the other entity mitigates risks within the entity you are attempting to import), then the system will bring-up the following screen:

From the “Options” drop down list you can either choose to import the linked entity, map the other entity control to an existing entity within the database or skip this process.
Note: if you decide to select the skip option, this will result in losing all related entity data.
Once you have selected the desired option Click “OK” to proceed or “Cancel” to terminate the import process.